You'll be an expert at displaying and responding to dialog boxes before this hour is over! Visual Basic makes the displaying of dialog boxes painless when you use the Common Dialog Box control. The Common Dialog Box control displays professional-looking dialog boxes inside your application so that the user can then select from familiar dialog boxes and so your application will look as if you spent hours mimicking the cool dialog boxes found in best-selling Windows applications such as Excel.
The highlights of this hour include
The Common Dialog Box control is perhaps the most powerful control available because of its multitalented abilities to become one of several common dialog boxes you've surely seen in Windows applications. In Hour 10, "List Boxes and Data Lists," you learned that the Combo Box control is multifaceted because the control acts like one of three kinds of combo boxes, depending on the Style property you set. The common dialog box goes far beyond the combo box's ability to take on different looks and purposes.
When you place a common dialog box on a form, you will not be able to resize it because the control, like the Timer control, will not appear on the form at runtime, at least not right away. Your runtime code will have to display the common dialog box, and the look of the common dialog box displayed depends on what your code needs at the time.
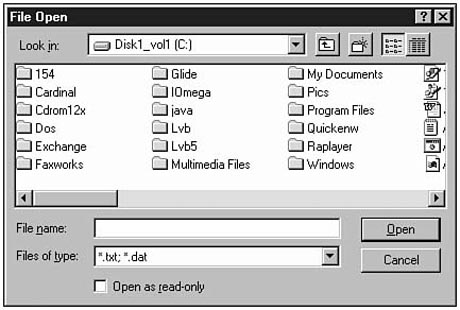
If you are going to work with a data file, you could display the File Open dialog
box, shown in Figure 12.1.
Figure
12.1. Using the common File Open dialog
box to request a filename and location.
New Term: The quick viewer is a Windows
application that pops up when you right-click over a filename. The quick viewer application
displays the file in its native format without your needing to own the original format's
parent application (such as Lotus).
Surely you've seen the File Open dialog box in many Windows applications. The dialog box works just like it does in Microsoft Word and other applications; the user can select a pathname or a filename, change the view by clicking one of the View buttons, open the file as read-only so no changes are made to the file, and even select another drive or computer to choose from by clicking the Look in drop-down list box.
NOTE: The Common Dialog Box control creates the same File Open dialog box in every respect as you see in other applications. For example, you can right-click over any folder or file displayed inside the dialog box, and a pop-up menu appears with which you can rename the object, quick view the object (if your system contains a quick viewer application for the selected file's type), open the object, copy, cut, or perform a number of other tasks.
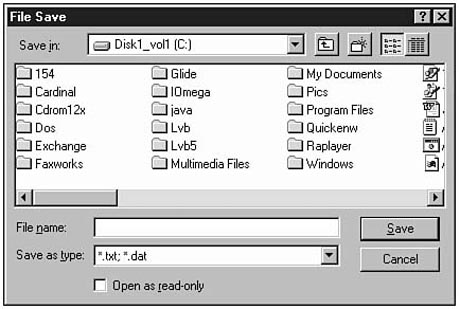
ThemfñéêèAfa'î[pi](c)bTTV2ox control also presents a
similar file-related dialog box, shown in Figure 12.2, that produces a File Save
dialog box. The user will also be familiar with the File Save dialog box. Your application
can control the type of files displayed (by setting an appropriate filename extension
type value) and can respond to the user's selection.
Figure
12.2. The File Save dialog box
is also familiar to Windows users.
You do not have to use the Common Dialog Box control. A dialog box is nothing
more than a form with controls on it. You can add a new form to any project (with
Project | Add Form) and put any controls you want on the form. The toolbox includes
several file-related controls such as the File List Box control and the Directory
List Box control that you can place on the form. The Common Dialog Box control, however,
makes sure that your dialog boxes that mimic those found in numerous other applications
perform in the same way as those in other applications. You want to present the same
set of common dialog boxes that your users are used to seeing in other applications,
or else they will not adapt to your application as quickly as they might otherwise.
In addition, using the Common Dialog Box control and setting a few properties are
much simpler and give you much more time than you would have if you created these
dialog boxes from scratch.
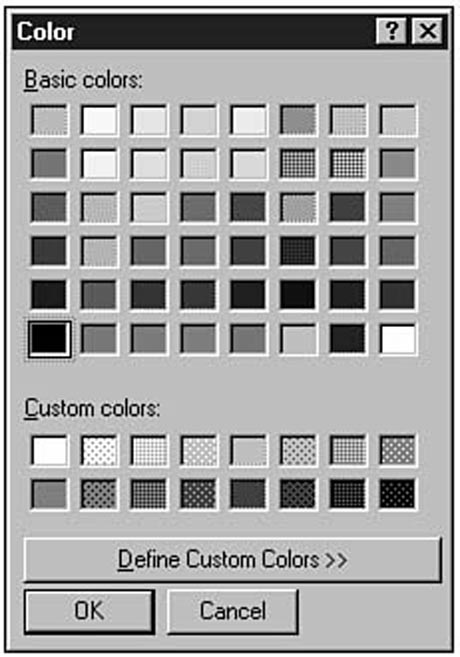
Figure 12.3 shows another common dialog box that the Common Dialog Box control can
generate. Your applications can display the Color selection dialog box any time you
want the user to select a color for an application such as a drawing application.
Windows supports several million colors, and the Color dialog box shows only a few
at a time, but the user can locate the exact color desired from the Color dialog
box or by defining his or her own custom colors by clicking the dialog box's Define
Custom Colors button.
Figure
12.3. Letting the users pick a color when
needed.
NOTE: The Common Dialog Box controls are front-end shells that present your users with a standard dialog box they can respond to. Your code must take over as soon as the user responds to the common dialog box and inspect the values the user selected. In other words, just because the user selects a filename in a File Open dialog box does not mean that your application opens that file as soon as the user clicks OK. The job of the common dialog box is only to give the user a typical dialog box interface. When the dialog box goes away, you must inspect the dialog box's return values and perform all the coding to open the file the user selected. The same is true of other common dialog boxes because they only return to your application the user's selection, but they do nothing with that selection on their own.
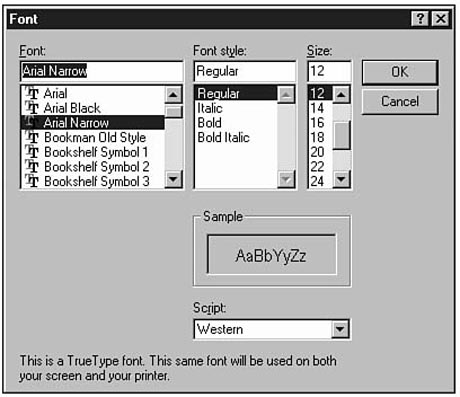
The Font dialog box, shown in Figure 12.4, is another common dialog box that the Common Dialog Box control can display for you. When your application works with text, you should give your user the chance to select a font name or style. Your application cannot always know in advance which fonts the user will have on his system. The Font dialog box will, however, give the user a chance to select font information from the user's own computer. Once selected, your application can use the user's selection values to generate the text in the selected font.
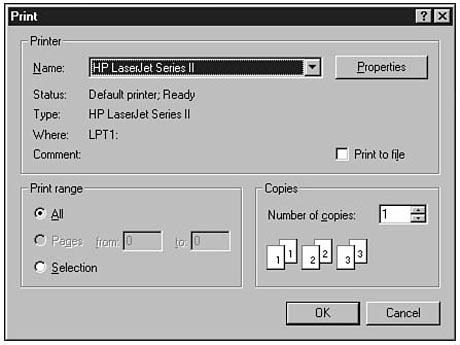
The Print dialog box, shown in Figure 12.5, displays a common printer dialog box
that you can display before printing any information to the printer. The dialog box
returns information the user selects about the print job that's about to happen.
As with the other controls, the Print dialog box only returns information to your
application, and it's up to your application to look at all relevant return information
and respond accordingly. Therefore, if the user elects to print six copies, your
code that follows the display of the Print dialog box must print six copies of the
printed output.
Figure
12.4. The Font dialog box shows
font information from the user's system.
TIP: Want to add fax capabilities to your application? No problem. Just display a Print dialog box when your user requests an application. As long as the user has installed a Windows-aware fax driver, such as WinFax Pro or Microsoft Fax, the user can select that fax driver from the Print dialog box's Name list box. Your output, as long as you set your application's printer to the user's selected value, goes to the fax machine instead of to the printer.
Figure 12.5. The Print dialog box lets the user select a printer for output.
WARNING: The Print dialog box that appears on your system might be very different from the one shown in Figure 12.5 when you display a Print dialog box. All of the Common Dialog Box control's dialog boxes display available information based on their own computer settings. Therefore, your application will use these dialog boxes to let the user select from his own properties that differ from yours, depending on how the user's computer differs from yours.
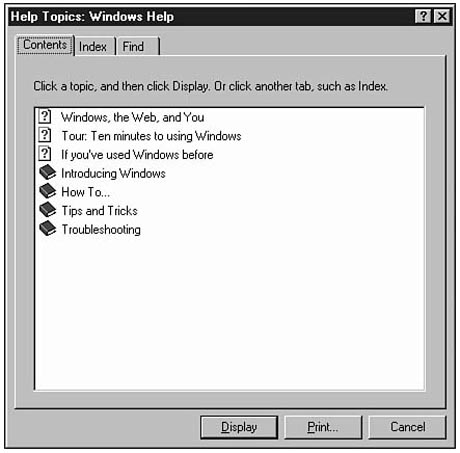
The final dialog box that the Common Dialog Box control can display is a Help
window such as the one in Figure 12.6. The Help window is linked to a help file that
you generate. Generating help files is not a trivial task, as you'll see in Hour
23, "Distributing Your Applications." Therefore, this lesson does not show
you how to connect a help file to your application. However, the Common Dialog Box
control's Help dialog box can produce the front-end dialog box your user interacts
with when you learn more about providing help in Hour 23.
Figure
12.6. The Help dialog box lets
the user request the help needed.
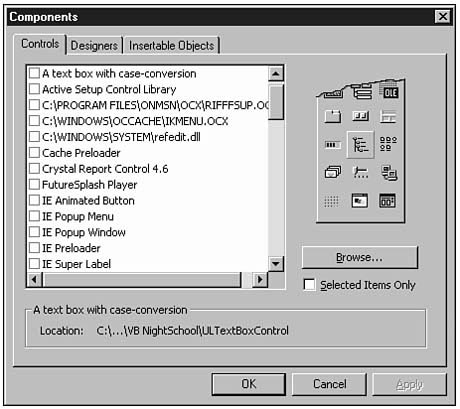
Although the Common Dialog Box control is known as a standard control, the control does not appear on your toolbox until you add the control. Perform these steps to add the Common Dialog Box control to your toolbox:
TIP: Search the Internet and Microsoft's home pages for additional ActiveX controls you can drop into your toolbox by selecting the tool from the Components dialog box. (You may have to click the Browse button to locate controls found in places other than your Windows\System folder.) An ActiveX control is identical to the toolbox's intrinsic controls and performs work when you set its properties and when you use methods and events related to the control.
Figure
12.7. You can select additional tools
to add to your Toolbox window.
New Term: ActiveX controls are controls you can add to your Toolbox
window. If a tool you need does not appear on the toolbox, that tool might appear
as an ActiveX control in the Components dialog box or even as an add-on tool you
can obtain from online services.
WARNING: You cannot use 16-bit VBX custom controls (controls used in earlier versions of Visual Basic), but you can add OCX controls that Visual Basic began using in version 4. An ActiveX control is identical to an OCX control except that a true ActiveX control does a little more, such as work across the Internet. All ActiveX controls end in the .OCX extension, so it is sometimes difficult to tell when you are looking at an ActiveX control or at a pre-ActiveX OCX control. All OCX controls work, both the old and new kinds of OCX controls, but VBX controls do not. When you have a choice, select the more current ActiveX OCX version over the pre-ActiveX OCX version.
When you add the Common Dialog Box control, you'll see several other controls listed in the Components dialog box. At any time you can add these other controls to your toolbox if you think you can use their help. For example, you can add the Microsoft Calendar control if you need to display calendar information in a Visual Basic application. You can add any ActiveX control to your toolbox, and Visual Basic comes with several that you see when you display the Components dialog box.
NOTE: If you use the Professional or Enterprise Editions of VB, you'll see more available controls than will users of the Standard Edition.
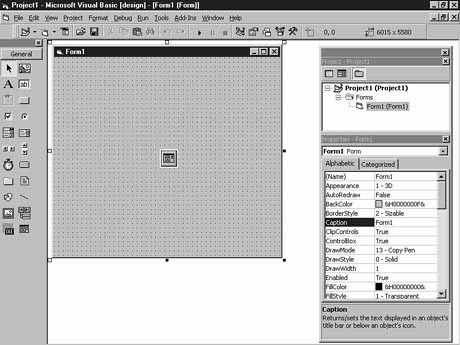
Only after adding the control to your project's Toolbox window can you add the
control to the project's forms. When you place the control on the form, the control
does not look like any of the controls it becomes (see Figure 12.8) because you,
through properties, determine what appearance the control will take and when the
control will appear.
Figure
12.8. You can select additional tools
to add to your Toolbox window.
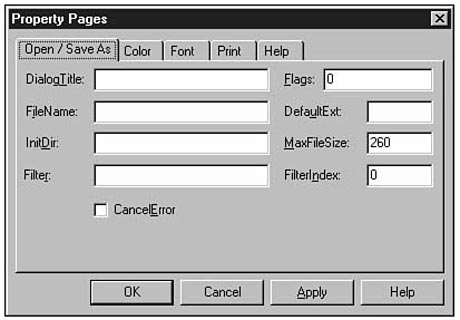
When you add a Common Dialog Box control to your toolbox and then double-click the control to add a dialog box to your Form window, Visual Basic offers an extra Properties window property called Custom that does not actually set one property, but sets multiple properties.
Figure 12.9 shows the tabbed Custom dialog box that appears when you click the Custom property. You'll see tabs across the top that display properties sheets for Open/Save As, Color, Font, Print, and Help dialog boxes. The properties sheets don't offer all properties, but the properties sheet does make entering the most common properties for each kind of dialog box easier.
You use the Custom properties sheets to set as many properties at design
time as you can. Your code can set the rest. For example, if you prefer to display
text using the Arial font that appears on most Windows systems, you can type Arial
in the Custom Font properties sheet for the FontName property.
When the user runs the application and displays the Font dialog box, Arial will be
selected. Of course, the user might change the selection, and if Arial does not exist
on the user's system, the Font dialog box may make a different font the default font.
Therefore, your code must check the dialog box's FontName property once
the dialog box returns control to your application to see if the user selected a
different font for you to use.
Figure
12.9. The Custom property makes
entering design-time common dialog box properties simple.
TIP: Fill in as many of the Custom values as you can at design time. (You can also change them or initialize these properties at runtime.) The more you fill in, the more you narrow the user's required selections. For example, if your application can open only files that end in the .MDB or .ASC filename extensions, type this value for the Filter property in the Custom dialog box: *.mdb; *.asc. The subsequent File Open dialog box will then show only those files; you've limited the number of files the user must wade through to select a possible file because no other filename will show up. (The user can display a different set of files by changing the dialog box's Files of type drop-down list box, but the user may inadvertently display and select a different kind of file that your application cannot read.)
To display a particular dialog box, your application must specify one of these methods:
Therefore, if your Common Dialog Box control is named cdbFile, your application can display the File Save dialog box with this statement:
cdbFile.ShowSave
The next few sections quickly show you how to set up each type of common dialog box.
To display a File Open dialog box, your application might contain the following statements:
cdbDialog.DialogTitle = "File Open"

cdbDialog.Filter = "*.txt"    ` Show only text files

cdbDialog.FileName = "*.txt"  ` Default filename

cdbDialog.ShowOpen            ` Trigger the dialog box
All of the File Open dialog box buttons and list boxes have property names. Therefore, you can initialize the File Open dialog box to have any default value that best matches your application's needs. When the user selects from and closes the dialog box, your application will have to test the dialog box's FileName and IntDir properties to locate the file the user selected.
To display a File Save dialog box, your application might contain the following statements:
cdbDialog.DialogTitle = "File Save"

cdbDialog.Filter = "*.*"         ` Show all files

cdbDialog.FileName = "test.txt"  ` Default filename

cdbDialog.ShowSave               ` Trigger the dialog box
Notice that the methods at the end of these last two code fragments have triggered the dialog box's display for the user.
To display a Color dialog box, you only need to change the DialogTitle property and issue the correct method, like this:
cdbDialog.DialogTitle = "Select a Color"

cdbDialog.ShowColor     ` Display the dialog box
The dialog box's Color property will hold the selected color when the user closes the dialog box and your code regains control. You can assign this Color property to other Visual Basic properties that require color values.
To display a Font dialog box, you only need to change the DialogTitle property, select a default font name and style if you want, set the kind of font to display, and then use the ShowFont method, like this:
cdbDialog.DialogTitle = "Font"

cdbDialog.FontName = "Arial"

cdbDialog.Type = cdlCFBoth

cmdDialog.ShowFont
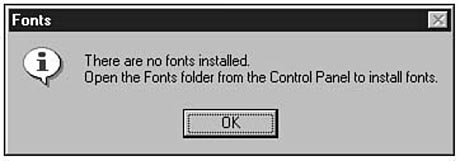
The Type property is required, or you will cause the error shown in Figure
12.10. cdlCFBoth is a named literal you can use with the Font dialog box.
The type cdlCFBoth tells Visual Basic to display the user's TrueType fonts
as well as any printer and screen fonts that appear on the system.
Figure
12.10. The Font dialog box cannot find
the correct fonts.
TIP: Search the online help for Flags Property (Font Dialog) for an exhaustive list of font type named literals you can use to control the fonts shown. (The Color, File Open, File Save, and Print dialog boxes also support numerous named literals you can use.)
To display a Printer dialog box, you only need to change the DialogTitle property and use the ShowPrinter method, like this:
cdbDialog.DialogTitle = "Select a Printer"

cdbDialog.ShowPrinter
This hour you have learned about the many facets of the Common Dialog Box control. Depending on the properties you set and the method you use to display the Common Dialog Box control, your user will see one of several dialog boxes. The dialog boxes look and act just like other professional Windows dialog boxes. The control lets you add powerful selecting dialog boxes with only a few lines of code.
Hour 13, "Modular Programming," moves back into a little theory by describing how to write better programs using modular, structured coding techniques.
The quiz questions and exercises are provided for your further understanding. See Appendix C, "Answers," for answers.
cbdDialog.DialogTitle = "Font"

cbdDialog.ShowFont
![]()
![]()
![]()
![]()
![]()